")
")
")
The Morphing dialog can be found in the Trickfilm. Source for the morphing effect are 2 or more frames from a CAT file.
Instead of a direct switching between these picture, the morph effect creates a smooth transition from one frame to the other.
It is necessary to mind some important aspects when creating a morphing.
How does the morph effect actually work?
In the beginning there is a point that is included in the start and in the end frame (e.g. point number 1). The Trickfilm calculates the points in between these two point positions over time and adds additional frames to the animation. The correlation of the points to each other base on their number in the figure.
If the number of points in the start and in the end frame, additional points are added automatically to make the morphing possible. It makes sense that start and end point are not too far away from each other to avoid strange morphing behavior.
In a square the first point is in the top left corner, in a circle it is at 3 o'clock position. On morphing from square to circle this first point makes his way to the corresponding point in the circle (at 3 o'clock position). The whole frame becomes flipped.
If the circle is created in a way that the point number 1 is at 11 o'clock position, the first points of both frames would be much closer together and the effect would apply better.
This is a step by step example of a frame morph:
Start PicEdit and RealTime parallely. Draw a red square in PicEdit and copy it to the temporary buffer with a click on the arrow pointing right ("Send to Temp").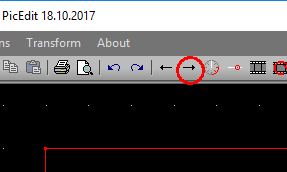
Create a Trickfilm in RealTime, stretch it to about 5 seconds duration and double click. Search a free space in the CAT window and insert the suqare with "Get from Temp" (click on arrow to the left):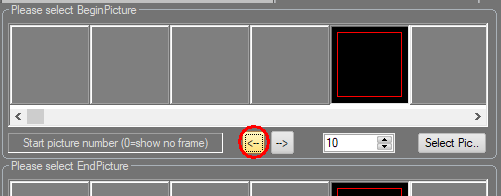
Back to the PicEdit, draw a green circle. Mind the position of the starting point (see above), it should be at around 11 o'clock: Usually it is at the 3 o'clock position. press "A" to mark all points. Select the rotate tool  . To rotate the circle, click exactly in the center of the circle and keep the mouse button presses. The first click specifies the swivel. Move the mouse (with still pressed mouse button) and move it until it is at the correct position.As it may be difficult to identify point number 1, open the Active Point Dialog with a click on
  This allows for stepping through each point of a figure. The active point gets selected.
Proceed the same way as described above to get the frame to RealTime. Place the Circle in the position next to the square, here the square is in 10, the circle in 11: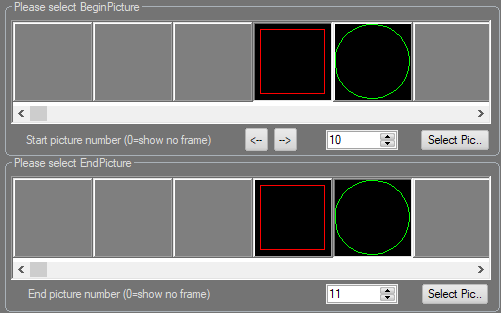
.Important: Select in the upper part "Begin Picture" number 10 and for "End Picture" use 11.
Switch to the Tab "Morph":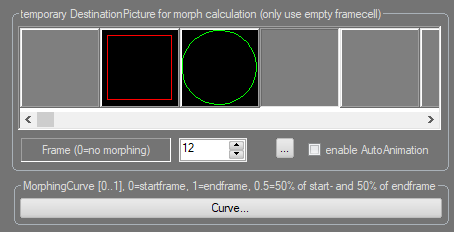
Not much to do here though. Select a free position in the CAT file where the software can temporary buffer the calculation. In this example it's 12. As long as this frame's value is 0, no morphing happens to it.
If the morph effect shall span more than 2 frames, also activate "enable AutoAnimation". This morphs through all pictures between the start and end framnem, meaning 1 to 2, 2 to3, 3 to 4 etc. - otherwise the morphing only happens between the start and the end frame.
The morph transition is linear. as an alternative it is possible to adjust the curve with a click on "Curve".
Close the dialog and click the black Play button (or use the manual preview):
Start: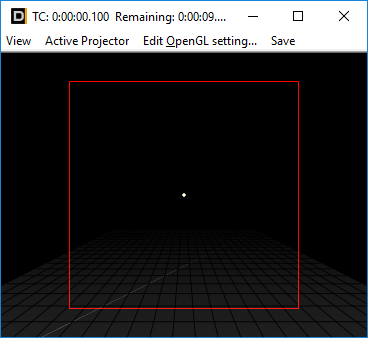
At 50% of the time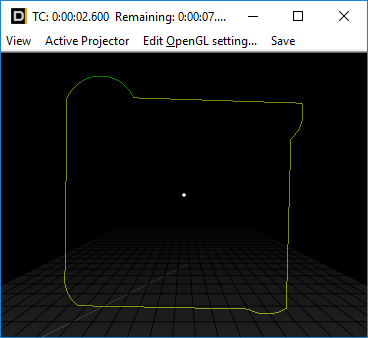
At 75% of the time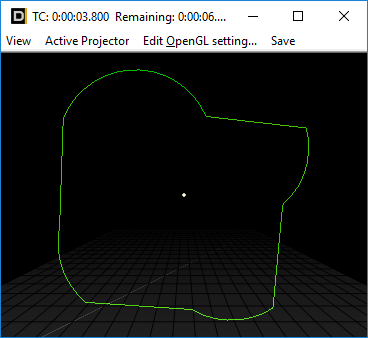
at 90% / 4.9 of 5 seconds ...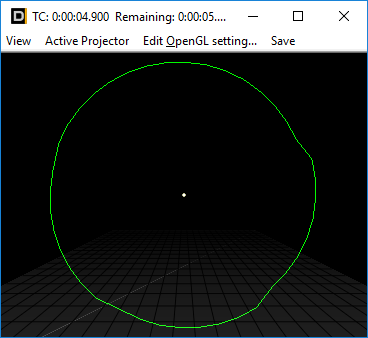
... is the morph animation nearly ready. If this should happen earlier or the circle should stay for longer, it can be adjusted in the Curve settings in the Morph window.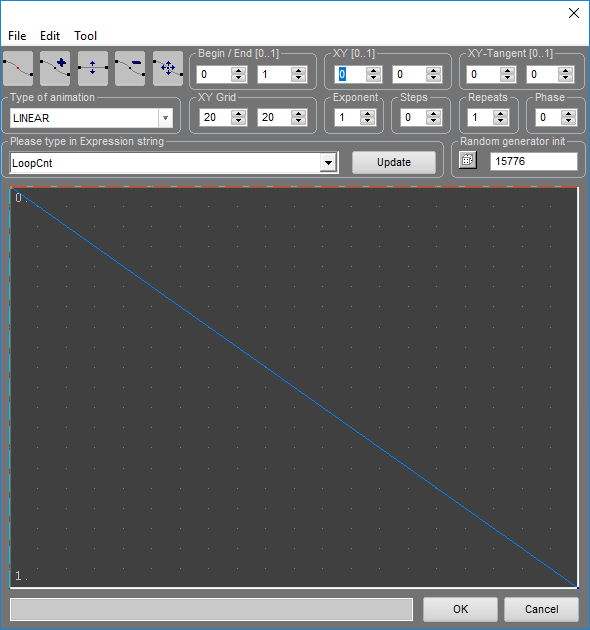
It's clearly visible that the standard morph curve is linear. The curve Window is explained more in detail in 3.5.3.
Add another point and move it as shown below: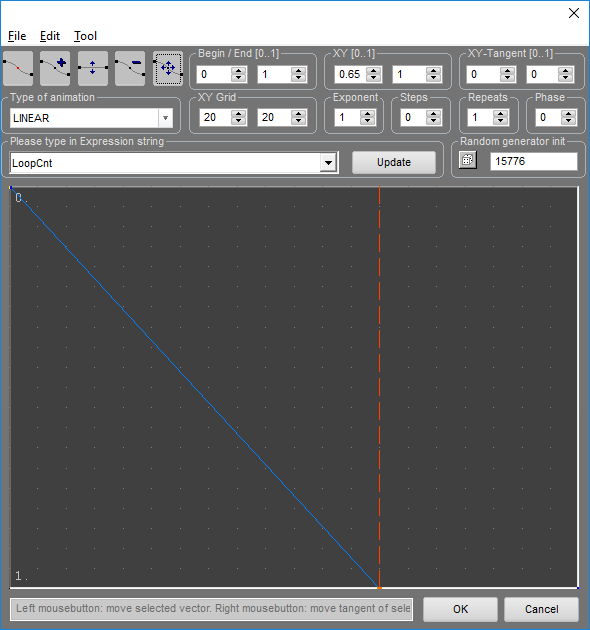
Now the end value is already reached at 70% of the timeframe. The blue line reaches until the right border, just very low and straight horizontal. There are no further changes during that last part opf the timeframe then.
Close with OK and check the result: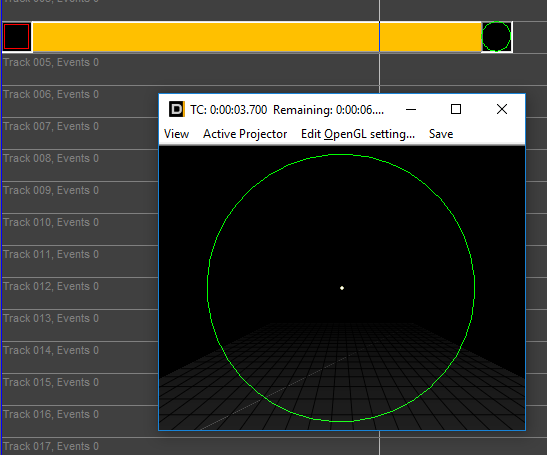
Result: The circle is drawn at a bit more than half of the timeframe and remains until the end.Result: The circle is drawn at a bit more than half of the timeframe and remains until the end.
It may have come to attention that not only the points themselves but also their color values get morphed with this effect. That's why it's not only suitable for morphing two different frames, but also for morphing two equal frames with different colors.
These are 2 frames to retrace:
A green line with distance 100 interpolated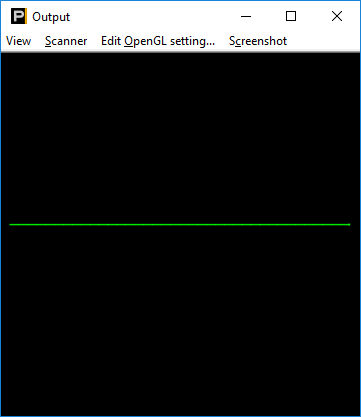
Second frame: Add a fade effect with PicEdit via "Gradient"
If morphed, the green line slowly gets fading out edges.